Spring is knocking. You want those long evenings on the balcony. An aperitif with friends. Sun on your face. But buying outdoor furniture? That burns a hole in your wallet fast. This is where DIY saves the day. You don’t need a professional workshop. You need a plan. And some elbow grease.
Transforming discarded wood into a statement piece is easier than you think. The trick is in the details. A well-executed build fools even the most critical eye. Your neighbors won’t know it came from a dumpster. They’ll think you spent thousands.
Here is how to build a coffee table with flawless finishes using materials destined for the trash.
Sourcing Free Solid Wood Pallets
The first step isn’t buying. It’s hunting. Walk past local supermarkets or commercial zones. Look for abandoned pallets. These are your raw materials.
Not all wood is created equal. You need EPAL stamped pallets. This stamp guarantees the wood was heat-treated. No toxic chemicals. Just safe, robust wood.
Inspect the boards carefully. Avoid anything with deep cracks. Look for signs of rot. If it’s soft, leave it. You want solid, dense timber.
Once you drag these home, you’ll need the right tools and materials.
- 2 solid, untreated wood pallets
- 1 box of exterior-grade wood screws
- 4 casters with locking brakes
- 1 jar of high-quality wood saturator (finish)
- Assorted sandpaper grits
The Art of Sanding: Revealing the Grain
Dismantle the pallets using a crowbar. Be careful. You don’t want to splinter the wood further.
Now comes the tedious part. Sanding. Do not skip this. A rough finish screams “cheap DIY.” A smooth finish screams “designer.”
Start with coarse grit paper. Knock down the splinters. Remove embedded dirt. Flatten any uneven edges.
Switch to fine grit. This creates that soft, salon-quality touch. Wipe away the dust with a damp cloth. The wood grain will pop. Natural knots and lines become features, not flaws.
Building a Robust Frame for Summer Nights
Stacking slats is lazy. It looks heavy. It looks neglected.
Build a frame. Cut support rails to size. Screw them together to create a sturdy, airy structure. Use exterior screws. Standard screws rust when exposed to rain. Rust ruins the look.
Check your angles. Use a carpenter’s square. If the frame isn’t square, the table will wobble. Stability is everything. You’re putting heavy drinks on this thing. It shouldn’t tip.
Adding Locked Casters for Mobility
A garden space changes. The sun moves. You might need to sweep the patio.
Install four casters with locking brakes. Mount them to the four corners of your base. This adds an industrial chic vibe. It also makes the table functional.
Move it to clean underneath. Lock it down when people are around. Small details like this separate amateur builds from pro-level furniture.
Creating a Seamless Surface Top
The tabletop is what everyone sees. Make it count.
Arrange your slats with intention. Match the grain patterns. Mix light and dark tones intentionally. The goal is a harmonious look.
Space the slats evenly. Use small notches as guides. Consistency is key. Even gaps make it look like a manufactured product.
The Hidden Removable Tray
Here is the secret sauce. The trick that actually fooled my neighbor.
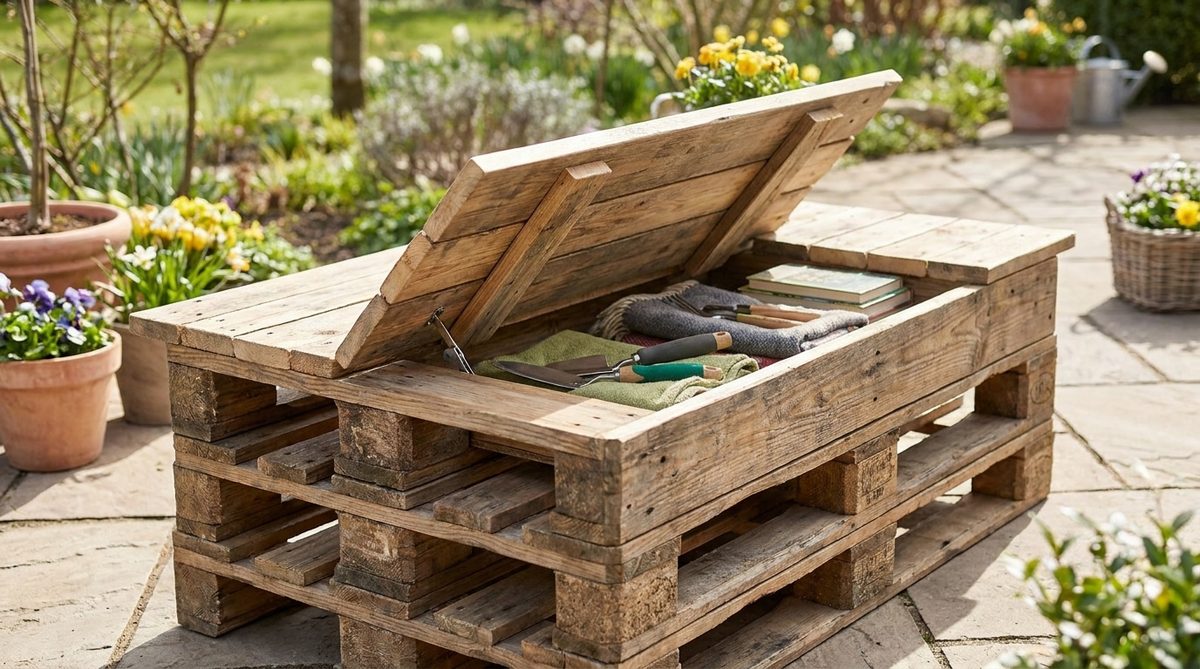
Don’t fix the top permanently. Build a removable tray.
Create a frame underneath your slats. Let the tabletop rest on this frame rather than being screwed directly to the base.
This creates a hidden compartment. Lift the top to store candles. Or blankets for chilly nights. Need to store the table for winter? Lift off just the top. Leave the base down. No heavy lifting.
It looks like a single unit. But it’s modular. Clever. Practical.
Start digging through those pallets this weekend. Your terrace will thank you. And your bank account will stay full.
The difference between a pile of wood and a piece of furniture? It’s all in the finish. And the patience to sand it down.
Why wood saturation beats traditional stains for exterior longevity
Raw wood left exposed to the elements turns gray and brittle. It’s a slow decay. You face a choice between traditional stains and penetrating saturators. Traditional stains sit on top. They create a film. That film often cracks or peels under thermal stress. It looks plastic. It traps moisture.
Saturators are different. They penetrate deep into the wood pores. They block water from the inside out. The result is a matte finish. It keeps the natural feel of the grain. No gloss. No fake shine. Just protected timber.
How to apply wood saturator for best results
Use a wide flat brush. Apply generously. Work with the grain. The wood drinks it up. Colors warm up instantly. Wait the recommended time. Then wipe off the excess. Use a dry cloth. Prevent sticky spots.
This creates an invisible barrier. Rain springs and summer heat won’t ruin it. Your investment lasts for seasons.
Building a modern bench from reclaimed lumber
Start with discarded planks. Stack them. Cut them to size. Assemble with precision. The result is striking. It’s geometric. It’s balanced. It looks expensive.
Place it on slate tiles. Or a woven jute rug. It fits any outdoor space. The contrast between the low cost of materials and the high design value is sharp. Guests notice. They ask where you bought it. You say you made it.
Replicating the DIY process
This isn’t a one-off project. Once you master the joinery and the finish, you can build anything. A matching bench. Small pedestals for lighting. A simple platform. The same principles apply.
Refined textures. Hidden framing. Proper sealing. These steps turn urban waste into high-end furniture. Home improvement isn’t about complex skills. It’s about smart habits. Give old wood a second life. Make your patio look sharp. Check your tool drawer. Try it yourself.